Alright, you nerds, it's time for another 'book'torial. The whole reason I created the first two 'book'torials (hereand here) was so that I could create this nerdy chic book clutch. I'm completely smitten with how it turned out. Carrying a library card never looked so fashionable. ;)
Wanna make your own?
HERE'S THE HOW TO:
Stuff You'll Need:
Book
Matte Mod Podge
Fabric
Needle and Thread
Clasp (This is the one I used.)
Wax paper
Wooden paint stirrer
Wood glue
Epoxy glue (I used J.B. Weld)
Note: Make sure the book you choose is big enough to hold the items you'd like to carry. For instance, your cell phone, keys, lipstick, etc.
Method:
2. Hollow the book out using the DIY: Book Safe Tutorial. Note: Don't glue the pages together just yet. We'll get to that later.
3. Cut a piece of fabric to fit the inside cover of the book and glue it in place using the Mod Podge. Do this on each side. We want the inside to look pretty too!
4. Now, we'll prep to glue the pages together with Mod Podge. Place wax paper in three different sections to keep these pages from being glued together. Place one piece in the middle of the book. This is where the opening of the book clutch will be. Place the other two on each end leaving out about 10 pages on each side. The pages on each side need to be free so that we can sew in fabric inserts later.
5. Brush a thin layer of Mod Podge along the page edges in the two middle sections between the wax paper only. Be sure to do the edges inside the hole in the book too. You'll need several thin coats to thoroughly seal the pages together. Place a stack of heavy books on top as you wait for it to dry. When you are finished, the outer 10 pages on each side should be unglued. The middle should also be unglued. Your book should now look like this:
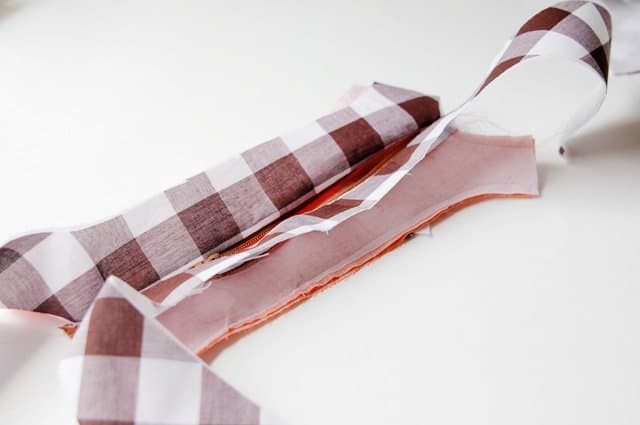
5. Using a needle poke through the outer pages. This is where we will sew in the fabric inserts.
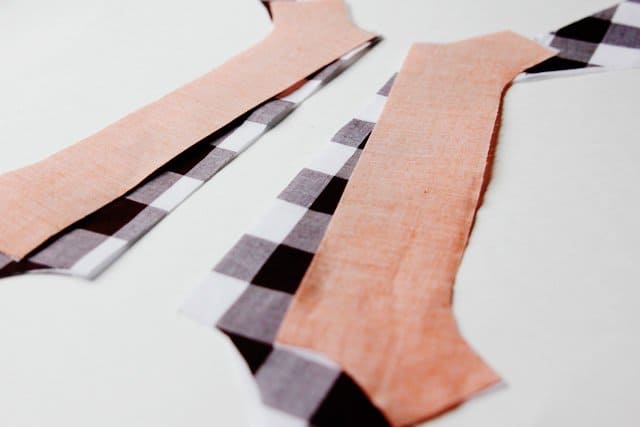
6. To make the pattern for the fabric insert, open the book as wide as you'd like the clutch to open and trace the basic shape. You'll then need to add an extra inch or so allowance on both sides. The allowance at the bottom should be a quarter inch longer than the width of the hole inside the book.
7. Once you have that basic shape, you'll need to create a mirror image as shown below. (Note: I practiced my pattern on a paper towel first to be sure it fit the dimensions of my book. I also used this pattern as the template for cutting my fabric.)
8. After you have the fabric cut outs (you'll need two), fold each one in half.
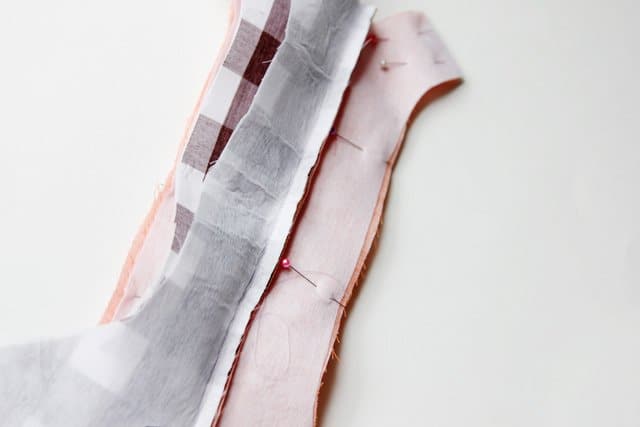
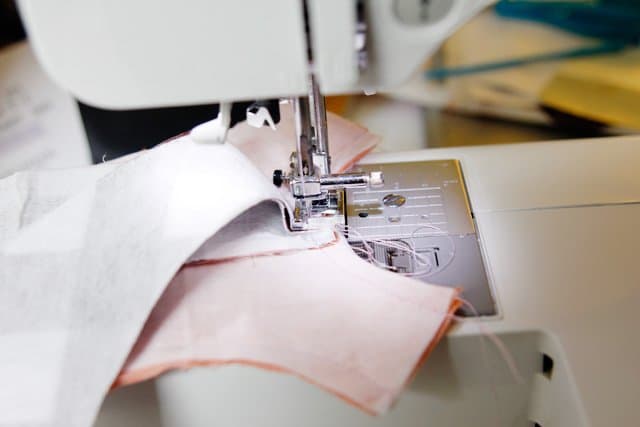
9. You should have the wrong side of the fabric facing out. Now, sew the bottom edge together like so...
10. Flip the fabric so that the right side is now facing out. Iron a crease down the middle so that they will fold nicely when you insert them into your book.
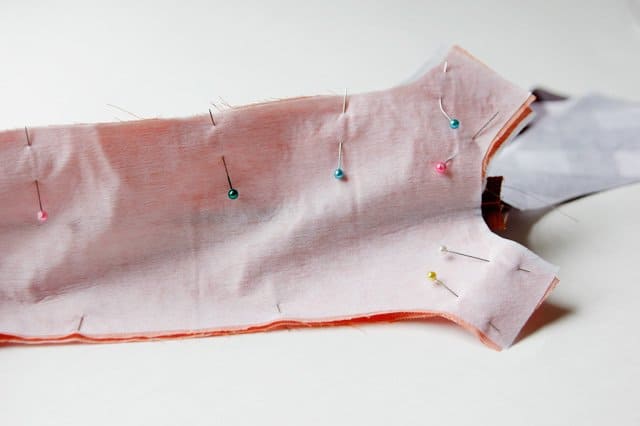
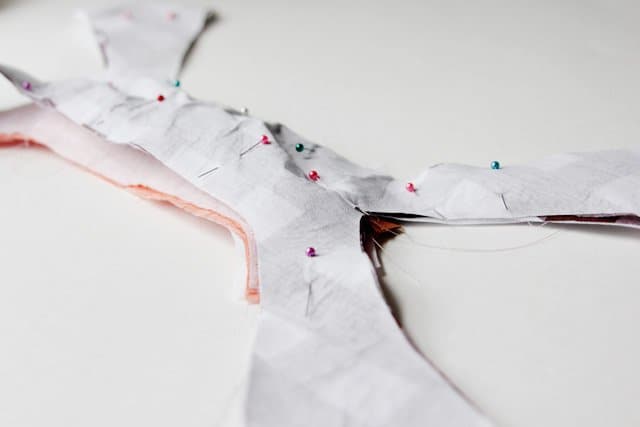
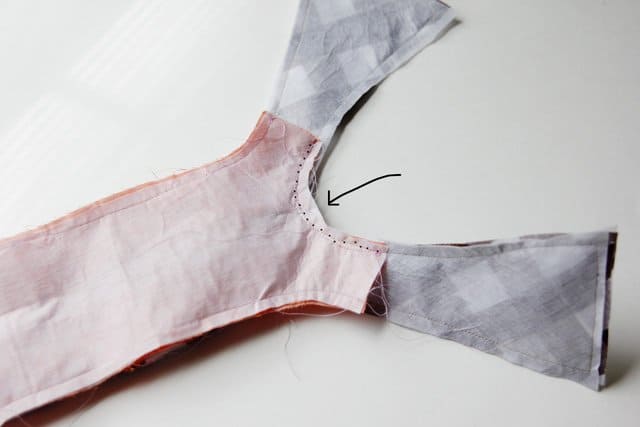
11. Next, stitch the insert into the pages through the holes you punched out earlier. The narrowest part of the fabric insert will be closest to the spine of the book. The crease in the fabric should point into the book.
12. After you've sewn the inserts into both sides of the book, use the Mod Podge to glue together those last few pages that were previously left free to the rest of the pages. Then, do the same to the book cover. Remember to use wax paper to prevent the opening in the middle from becoming glued shut.
13. Finally, glue the clasp to the front. First, I added small wooden risers to the book with wood glue so that the latch would stick out over the edge of the book. (Hint: I created the wooden risers by cutting a paint stirrer I had lying around the house.) Then, I glued the clasp these wooden risers with the epoxy glue. Be extra careful not to glue the opening shut in this step. Wax paper can help make sure that this doesn't happen.
And that's all there is to it. Grab your phone, keys and library card and you are good to go....
credit :
 2. Use a second color of paint and a letter stencil to add your initial or monogram. I positioned mine in the bottom corner of my mouse pad. I taped it down with masking tape and used a small amount of paint on my foam brush with an up and down blotting motion.
 3. Warm up your glue gun and run a bead of glue along the side of your mouse pad, about an inch or so at a time. Stick in your pom poms while the glue is still hot, and use the glue sparingly so it doesn't ooze out of the sides. You can use your finger nail to scrape off any oozing glue if needed (just don't burn yourself!). Work your way around the mouse pad and you're done!
 I'm pretty excited about the new addition to my desk… and when I'm not using it as a mouse pad, I can use it as a giant coaster. :)
 This craft is for all you fellow pom pom lovers out there. All you need is a cork trivet (yep, a trivet!) and pom poms in your favorite colors. Let's get started!


